Medieval sieges could drag on for years, not from lack of determination but because castle architects turned fortresses into death traps. Every stone, slit, and spiral staircase was engineered to kill attackers while keeping defenders alive.
1. Murder Holes and Machicolations: Raining Death From Above
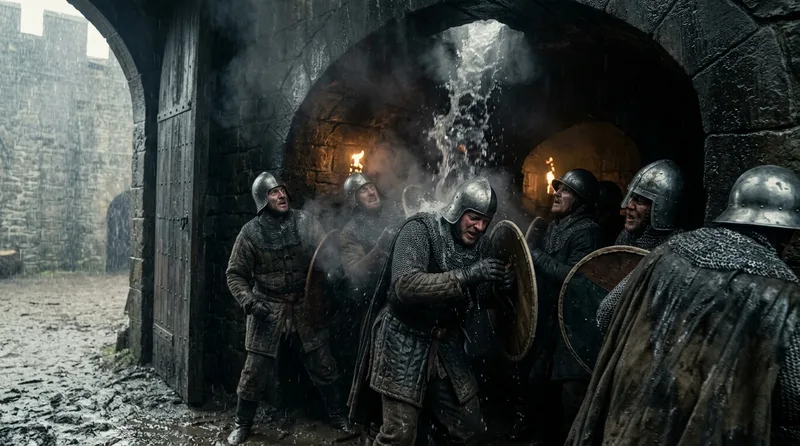
The ceiling suddenly opens, and boiling water cascades onto soldiers trapped below—this nightmare scenario defined murder holes, gaps in castle floor vaults positioned directly above entry passages. Château de Pierrefonds in France, rebuilt in the 1390s, featured elaborate machicolations: stone projections jutting from walls with openings in their floors. Defenders at Dover Castle in 1216 poured quicklime through these openings during Prince Louis of France’s siege, blinding attackers and searing exposed skin. The openings measured roughly 12 inches wide, enough to drop stones weighing 20 pounds or cauldrons of heated sand that infiltrated armor joints. Architects placed murder holes at every vulnerable passage: gatehouse entries, corridor bends, and bridge approaches. The psychological impact proved as devastating as the physical damage—attackers knew death could rain down at any step. This vertical defense advantage meant a handful of defenders could neutralize dozens of soldiers funneled into kill zones. Medieval chronicles from the Siege of Kenilworth in 1266 describe defenders dropping heated iron bars through machicolations, which penetrated wooden shields and helmets. The innovation spread rapidly after 1150, transforming castle architecture across England and France into layered death traps where gravity became the defender’s greatest weapon.
Source: britannica.com
2. Concentric Castle Walls: The Fortress Within a Fortress
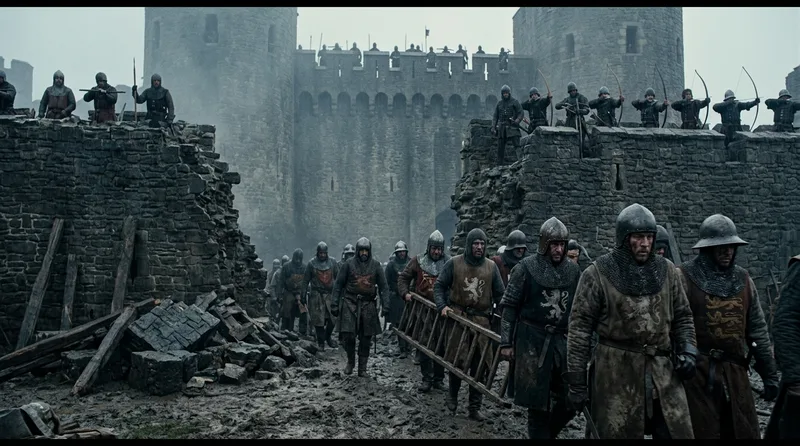
Breaching the outer wall only revealed a taller, thicker inner wall bristling with archers—this disheartening reality defined concentric castles, pioneered by Byzantine engineers and perfected by Crusader architects in the 1180s. Krak des Chevaliers in Syria, expanded between 1142 and 1170, featured two complete rings of fortification with the inner wall standing 30 feet higher than the outer perimeter. Edward I of England built eight concentric castles in Wales during his 1277-1283 conquest, including Beaumaris Castle with walls 15 feet thick and 40 feet high surrounding an inner ward protected by 23-foot-thick walls reaching 60 feet. The space between walls, called the lists, became a killing ground where attackers faced crossfire from both ramparts simultaneously. Defenders on inner walls shot over their comrades’ heads on outer walls, doubling arrow density. If attackers captured the outer wall, they found themselves trapped in the lists with nowhere to shelter from projectiles raining from superior positions. The design required enormous resources: Beaumaris consumed 375,000 pounds sterling and remained unfinished after 35 years of construction. Saladin’s army besieged Krak des Chevaliers unsuccessfully in 1188, unable to breach even the first wall. Only internal betrayal or starvation could crack these architectural masterpieces, making concentric castles the ultimate expression of medieval defensive engineering.
Source: britannica.com
3. Arrow Slits: The Geometry of Medieval Crossfire
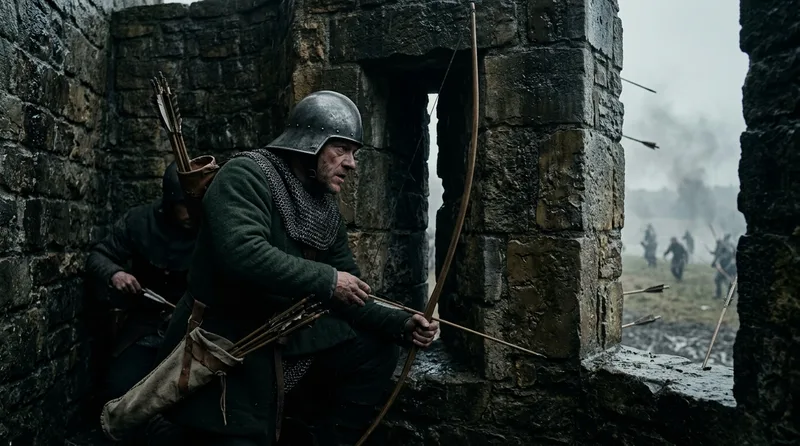
The narrow vertical slit looked harmless until arrows erupted from its darkness at 3-second intervals—arrow loops, or arrow slits, transformed castle walls into lethal firing platforms while protecting defenders behind 8-foot-thick stone. Engineers at Framlingham Castle in Suffolk perfected the design around 1190, creating loops just 6 inches wide on the exterior but flaring to 3 feet inside, giving archers 180-degree firing arcs. The classic cross-and-slit design emerged in the 1260s: a horizontal bar intersecting the vertical opening allowed crossbowmen to aim while kneeling, standing, or tracking moving targets. Bodiam Castle in Sussex, completed in 1392, featured 143 arrow slits positioned to create overlapping fields of fire with no blind spots around the perimeter. Medieval crossbows achieved 370-foot effective ranges, and skilled archers could shoot 12 bolts per minute through properly designed slits. The loops sat at staggered heights—every 3 vertical feet—ensuring defenders could rotate positions without interfering with each other’s shots. Attackers targeting these narrow openings had roughly 1-in-50 odds of landing a shot inside, while defenders fired from darkness into sunlit killing zones. The mathematics of crossfire proved devastating: at Château Gaillard’s siege in 1204, French records note arrow slits covering the approach road delivered sustained fire that killed 80 soldiers in a single afternoon. This geometric precision turned passive stone into active weaponry, multiplying each defender’s lethality tenfold.
Source: britannica.com
4. Portcullis and Barbican Systems: The Trap Within the Gate
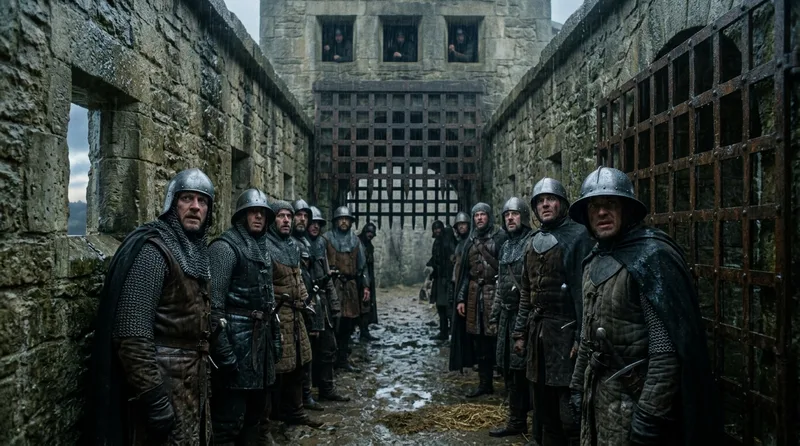
The iron gate crashed down behind attackers while another dropped ahead, trapping soldiers in a stone corridor where murder holes opened above—this nightmarish scenario showcased the portcullis-barbican combination that made castle gates nearly impregnable. The portcullis, a vertical sliding gate weighing up to 1,500 pounds with iron-tipped wooden or metal grilles, dropped in 2 seconds when defenders cut the restraining rope. Warwick Castle’s main gatehouse, rebuilt in 1364, featured three successive portcullises spaced 20 feet apart with murder holes between each barrier. The barbican, an fortified outer gatehouse, extended 60 feet beyond main walls at locations like the Tower of London, forcing attackers to advance through a narrow passage under constant arrow fire from walls on three sides. During the 1267 siege of Kenilworth Castle, attackers who breached the barbican found themselves trapped between two portcullises while defenders dropped stones through overhead openings, crushing 30 men. The mechanisms employed counterweights and winches hidden in upper chambers, requiring teams of 4 soldiers to raise but dropping instantly when released. Bodiam Castle’s barbican featured a right-angle turn that prevented battering rams from gaining momentum, while arrow slits in the passage walls allowed flanking fire. The psychological impact devastated morale: chronicles from the Siege of Rochester in 1215 describe King John’s soldiers refusing to enter the barbican after the first assault killed 40 men in minutes. This multilayered gate defense transformed the castle’s most vulnerable point into its deadliest killing ground.
Source: britannica.com
5. Strategic Moat Engineering: Depth, Width, and Deadly Surprises
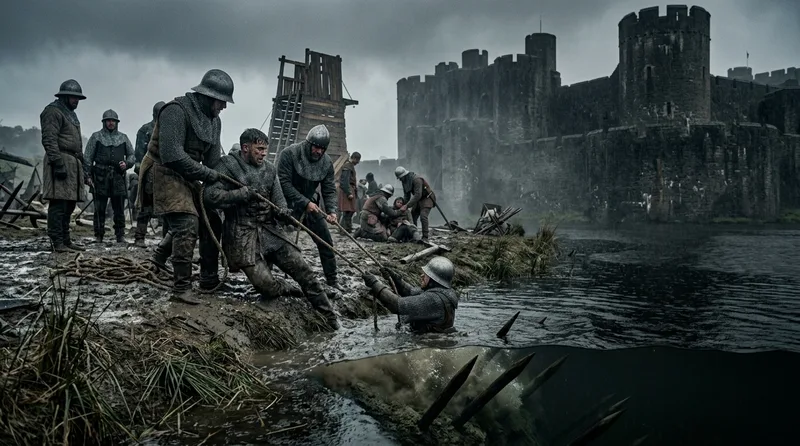
The moat appeared crossable until soldiers discovered the water concealed a 20-foot drop and sharpened stakes—medieval moats were engineered death traps, not mere decorative water features. Caerphilly Castle in Wales, constructed between 1268 and 1271, boasted a moat system covering 30 acres with water depths reaching 15 feet and a width of 50 feet on the south side. Engineers positioned moats not for maximum width but optimal distance: too close and siege towers could bridge them, too far and they wasted defensive arrow range. The ideal placement fell 60 feet from walls, forcing attackers to cross under sustained missile fire while preventing siege engines from approaching. Bodiam Castle’s moat averaged 8 feet deep and 90 feet wide, fed by springs producing 4 feet of visibility—enough to hide underwater obstacles. Some castles embedded iron spikes in moat beds or suspended chains just below the surface to entangle swimmers, while others introduced pike fish that attacked wounded soldiers. At Kenilworth Castle, the largest moat in England covered 111 acres and included swampy approaches that bogged down siege equipment, contributing to the 172-day siege endurance in 1266. Drained moats served equally well: the 35-foot-deep dry moat at Dover Castle created a chasm requiring massive ramps to cross. Moats also prevented undermining, the primary siege tactic of medieval warfare, by flooding any tunnels attackers dug. The engineering precision required extensive hydraulic knowledge—diverting rivers, installing sluice gates, and calculating water flow rates to maintain consistent depths year-round.
Source: britannica.com
6. The Keep: Last-Stand Architecture Built for Months of Isolation
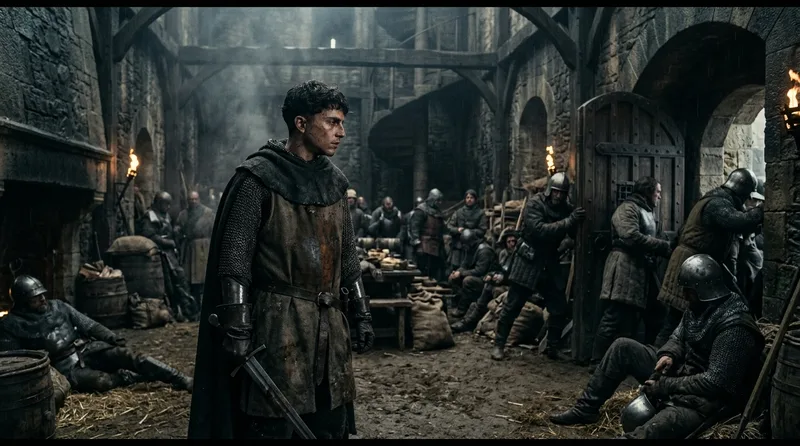
When outer defenses failed, defenders retreated to a massive tower with 12-foot-thick walls, its own well, and supplies for 6 months—the keep transformed surrender into prolonged resistance. Rochester Castle’s keep, completed in 1127, soared 113 feet high with walls 12 feet thick at the base, containing four floors of living space, storage chambers, and a chapel that doubled as a final defensive position. The keep at Dover Castle, built between 1180 and 1191, measured 98 feet tall with 21-foot-thick walls at ground level and housed 1,000 soldiers plus provisions for extended sieges. Architects designed keeps as self-contained fortresses: integral wells reaching 300 feet deep, kitchens with massive fireplaces, and storage vaults holding 50 tons of grain. The entrance sat on the second floor, accessible only by removable wooden stairs that defenders burned when threatened. During the 1215 Siege of Rochester, King John’s forces undermined a keep corner, collapsing it with fire from 40 pig carcasses, yet defenders held the remaining three-quarters for another 7 weeks. Keep walls incorporated internal passages and galleries where defenders moved unseen, emerging at arrow slits to fire on attackers who breached the bailey. The square Norman design gave way to circular keeps like Conisbrough Castle’s 1180s tower, eliminating corners that siege engines could target. Keeps represented psychological warfare as much as military architecture—their imposing mass visible for miles announced to attackers that even capturing the outer castle meant facing months more of deadly resistance.
Source: britannica.com
7. Crenellations and Hoardings: Modular Armor for Castle Walls
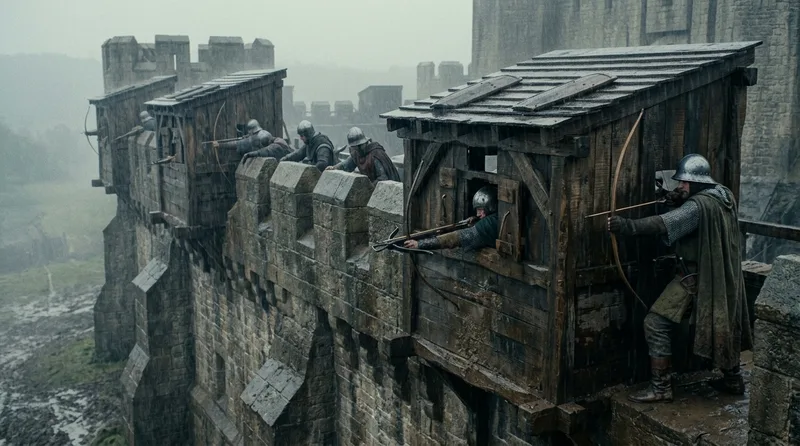
The alternating pattern of solid merlons and open crenels looked decorative until defenders crouched behind 7-foot stone blocks while archers fired through 2-foot gaps—crenellations turned walls into protected firing platforms. These battlements, standardized across Europe by 1200, featured merlons (solid sections) averaging 6 feet tall and 4 feet wide, with crenels (gaps) measuring 2 feet wide, creating a rhythm that maximized protection while allowing sustained archery. Warwick Castle’s 14th-century walls incorporated 165 merlons along 600 feet of battlements, each topped with a capstone to prevent weather erosion. Hoardings, temporary wooden galleries projecting beyond wall faces, extended defensive capabilities during sieges. Carcassonne’s 1240s fortifications featured permanent stone corbels supporting wooden hoarding platforms that hung 3 feet beyond walls, with floors perforated for dropping projectiles. These structures transformed vertical walls into overhanging death traps—defenders poured boiling oil through hoarding floor gaps onto soldiers attempting to scale walls or operate battering rams. During the 1304 Siege of Stirling Castle, Scottish defenders erected hoardings that allowed them to fire directly downward, killing 90 English soldiers in a single day. The wooden construction allowed rapid hoarding installation when scouts reported approaching armies, then removal after sieges to prevent fire arrow damage. Some castles like Château de Fougères installed permanent stone machicolations that served hoarding functions without fire vulnerability. The crenellation license became a status symbol in 14th-century England, with only royal permission allowing fortified battlements, transforming practical defense into aristocratic privilege.
Source: britannica.com
8. Well Engineering: The Lifeline Determining Siege Duration
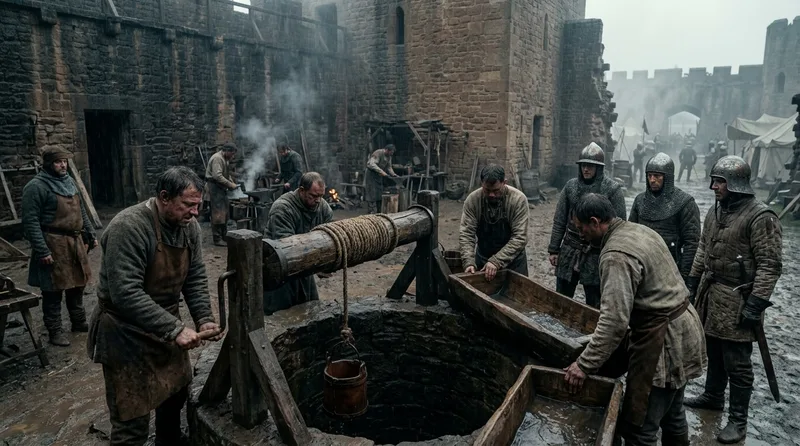
Defenders could endure months of bombardment but surrender within days if the well ran dry—water access determined medieval siege outcomes more than military prowess. Beeston Castle in Cheshire featured a well plunging 370 feet through solid rock, requiring 9 years to excavate from 1220 to 1229, with workers cutting through sandstone at 3 feet per month. Castle engineers positioned wells in the most defensible location: typically the inner bailey or keep basement, ensuring attackers who captured outer walls couldn’t poison water supplies. Dover Castle’s well, dug in 1180, reached 285 feet and supplied 1,200 defenders during the 1216 siege, producing 40 gallons per hour from an underground spring. The engineering required precise geological knowledge—medieval well-diggers tracked underground water tables by observing vegetation patterns and digging test shafts. Failure proved catastrophic: Château Gaillard’s garrison surrendered in 1204 after 6 months partly because their inadequate well system forced water rationing to 1 pint per person daily. Some castles incorporated redundant systems—Caerphilly Castle featured 3 separate wells, ensuring defenders maintained water access if attackers captured any single position. The deepest known medieval well, at Königstein Fortress, reached 499 feet and took 28 years to complete. Wells also served psychological warfare: defenders occasionally dropped dead animals into besiegers’ water sources during sorties. The 172-day Siege of Kenilworth in 1266 ended not from military defeat but Edward I’s decision that starving defenders would cost more time than the castle’s strategic value warranted—the well ensured defenders could have lasted another 6 months.
Source: britannica.com
9. Clockwise Spiral Stairs: The Right-Handed Defender’s Advantage
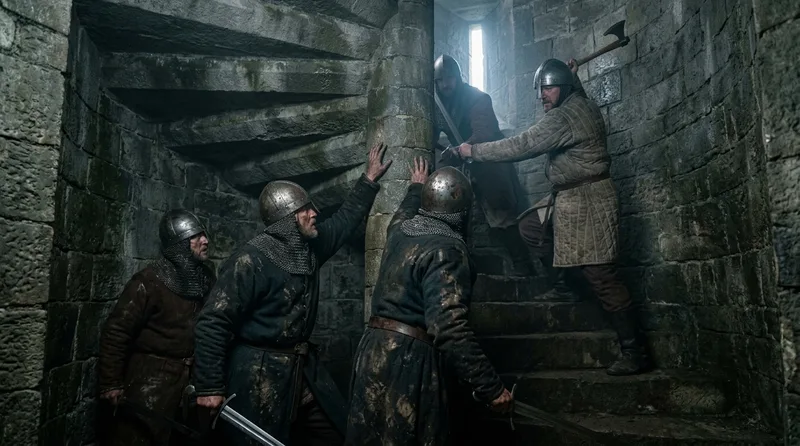
Attackers ascending the spiral staircase found their sword arms pressed against the central column while defenders above swung freely—this asymmetric advantage came from deliberate architectural design favoring right-handed defenders. Medieval castle staircases spiraled clockwise ascending in 95 percent of European fortifications, a pattern established by Norman builders in the 11th century and refined throughout the 1200s. The central newel post, typically 3 feet in diameter, restricted right-handed attackers’ sword arcs to cramped downward chops while defenders wielded weapons in wide, devastating overhead strikes. Caerphilly Castle’s keep staircase, built in 1271, rises 60 feet with each step measuring 11 inches tall and wedge-shaped—the narrow inner edge only 6 inches wide forced attackers into single file. The confined vertical battlefield favored defenders through geometric inevitability: one skilled swordsman could hold a staircase against dozens, as occurred during the 1204 siege of Château Gaillard when a single knight defended a tower staircase for 3 hours, killing 18 attackers. Some castles incorporated irregular step heights—Beeston Castle alternates 9-inch and 13-inch rises—causing attackers unfamiliar with the pattern to stumble in darkness while defenders moved confidently. The few counterclockwise staircases belonged to left-handed castle lords: Ferniehirst Castle in Scotland features reverse-spiral stairs built for left-handed Kerr clan members. Lighting intensified the advantage—arrow slits illuminated defenders from behind while attackers climbed into darkness, their eyes adjusted to bright lower levels. This subtle architectural choice transformed staircases from neutral passageways into defender-optimized killing zones where spatial geometry delivered victory.
Source: britannica.com
10. Stone Vaulting: Fire-Resistant Chambers That Frustrated Siege Tactics
Fire arrows and burning projectiles that devastated wooden structures harmlessly scattered off curved stone ceilings—barrel vaulting and groin vaulting transformed vulnerable chambers into fireproof strongholds. Dover Castle’s great tower, completed in 1191, incorporated stone vaulting throughout 5 floors, with barrel vaults spanning 25 feet and weighing 400 tons, supported by walls 21 feet thick. Medieval siege tactics relied heavily on fire: attackers launched clay pots filled with burning pitch, shot fire arrows through windows, and ignited anything wooden. Stone vaulting eliminated this vulnerability—the curved ceiling design deflected projectiles while the masonry construction made ignition impossible. The Tower of London’s White Tower, renovated with stone vaults in the 1240s, survived multiple sieges specifically because fire could not spread between floors. Vaulting required masterful engineering: masons at Château de Coucy constructed 98-foot-diameter groin vaults in the 1220s using 18-inch-thick stone ribs supporting lighter infill panels. The construction consumed enormous resources—a single vault required 600 tons of stone and 6 months of work by teams of 30 masons. Beyond fire resistance, vaulting strengthened structures against siege engine bombardment: the curved surfaces distributed impact forces across wider areas than flat ceilings. During the 1304 Siege of Stirling Castle, trebuchet stones weighing 300 pounds shattered wooden-roofed buildings but merely chipped vaulted chambers. Some castles like Bothwell in Scotland incorporated double vaults with sand-filled cavities between layers, absorbing impact energy. The investment in stone vaulting separated formidable fortresses from vulnerable strongholds, making the difference between capitulation and endurance during medieval Europe’s countless sieges.
Source: britannica.com
Did You Know?
Did You Know? The spiral staircase defense worked so reliably that when Ferniehirst Castle’s left-handed Kerr clan built their fortress with counterclockwise stairs, it created such confusion among right-handed attackers that the architectural choice became legendary in Scottish warfare—proving that reversing a single design element could transform an entire defensive strategy. Medieval castle architects weren’t just builders but military strategists who turned geometry, gravity, and even handedness into lethal weapons that made sieges last not days but years.